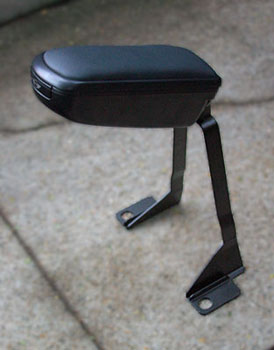
MINIs have not been available with armrests and because of that there is a large selection of aftermarket armrests. Unfortunately most are very expensive, nonfuctional, and don't match the interior. Luckily MINI is finally introducing its own in 2005 that not only matches perfectly, opens for storage, and folds out of the way, but is cheaper than all the aftermarket armrests as well.
Parts:
Order from your dealership parts department:
(1) MINI OEM Armrest 52 12 0 154 307 $195.00us
Tools:
Torx40 bit and wrench to turn it
Time:
15 minutes
The armrest comes as one piece:

It simply installs under the seat brackets on the floor. Slide both seats all the way back. At the front end of the seat rails you will see a Torx40 screw. Loosen the inside front screws a few turns, but do not remove them. Then slide the seats all the way forward. From the back, find the rear innner seat rail screws. Remove both of these screws. You should now be able to push forward on the seats a create about an inch of clearance under the rear inner seat rails. Slide the armrest feet underneath the rails so their screw holes line up with the screw holes of the seat rails. This may require some force as well as squeezing together of the feet. Once in place, screw the screws back in and tighten (MINI recommends adding some locktite to the rear screws). Remember to tighten the front screws as well.
